Imagine stepping out your back door onto a stunning patio where you can sip your morning coffee, host a summer barbecue, or relax under the stars. Or, perhaps, picture a driveway that makes your home stand out on the block, or a charming walkway that winds through your garden. What if I tell you that these beautiful outdoor spaces are achievable with paver installations?
In this ultimate guide, we’ll take you step-by-step through the process of planning, designing, and completing your paver project. Whether you’re thinking of a cozy patio, a stylish driveway, or a picturesque garden path, we’ve got you covered with tips, insights, and inspiration to make your vision a reality.
Key Points
- Paver installation is the process of laying individual pavers to create durable and customizable outdoor surfaces.
- Pavers offer durability, easy maintenance, and the flexibility to enhance any outdoor space.
- Pavers can enhance your patios, driveways, walkways, pool decks, and cozy fire pit areas.
- Proper planning, a solid foundation, and quality materials are essential for a long-lasting paver project.
What Is Paver Installation?
A paver installation is the process of laying down individual pavers — made of materials like brick, concrete, or natural stone — to create outdoor surfaces such as patios, pathways, driveways, or pool decks. Unlike poured concrete, pavers are installed piece-by-piece in a variety of patterns, offering flexibility and easy maintenance.
Pavers are built to withstand the elements, heavy traffic, and time, making them an excellent investment for any outdoor space. Plus, the endless design options mean you can customize your project to match your unique style and needs.
Whether you want a cozy patio for summer evenings or a sturdy driveway that adds curb appeal, paver installations offer endless possibilities.
Why Should You Consider Paver Installations?
If you’re still on the fence, here are some compelling reasons why pavers are a smart choice for your home:
- Durability and Longevity: Pavers can handle years of wear and tear without cracking or fading, unlike traditional concrete.
- Easy Repairs: If one paver gets damaged, you can replace it without redoing the entire area.
- Versatility: There are countless colors, shapes, and patterns to match your taste and property style.
- Boosts Home Value: High-quality paver installations add beauty and can increase your home’s resale value.
- Better Drainage: Pavers help with water drainage, reducing the risk of pooling and damage.
- Low Maintenance: Once installed, pavers require minimal upkeep to stay looking great.
Types of Paver Installations
When planning a paver installation, it’s important to know the various types of projects you can undertake. Each type serves a different purpose and comes with unique considerations.
-
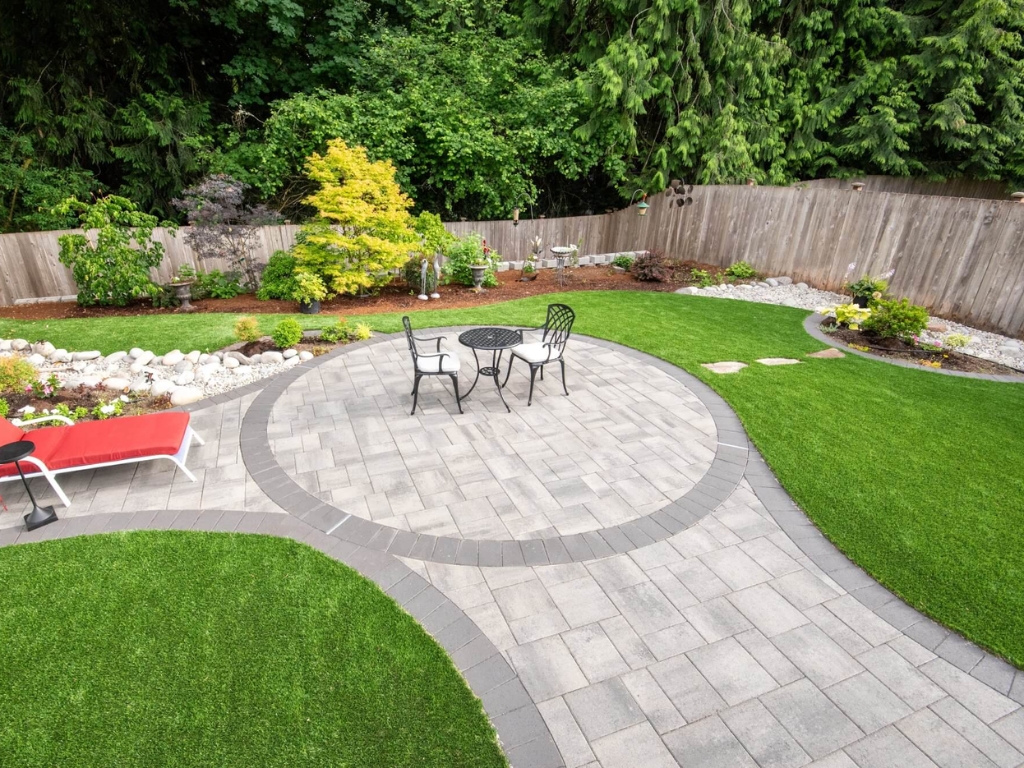
Patio Pavers
Patio pavers are perfect for creating functional outdoor living spaces where you can entertain guests, enjoy meals, or relax. They come in various materials like concrete, brick, or natural stone to suit your home’s style.
-
Driveway Pavers
Driveway pavers provide a durable and visually appealing surface for your vehicles while enhancing curb appeal. Materials like interlocking concrete or brick pavers are ideal for handling vehicle weight and frequent use.
-
Walkway Pavers
Walkway pavers help create charming paths that connect different parts of your yard or garden. They add functionality and a touch of elegance to your outdoor space.
-
Pool Deck Pavers
Pool deck pavers provide a safe and stylish surface for your pool area. Choose slip-resistant pavers that can withstand moisture, chlorine, or saltwater.
-
Garden Path Pavers
Garden path pavers add charm and practicality to your garden, guiding you through plants and flowers. Stepping stones or small pavers create a natural, rustic look.
-
Outdoor Kitchen Pavers
Outdoor kitchen pavers define a sturdy and attractive foundation for your outdoor cooking area. Choose pavers that are heat- and stain-resistant to withstand spills and high temperatures.
-
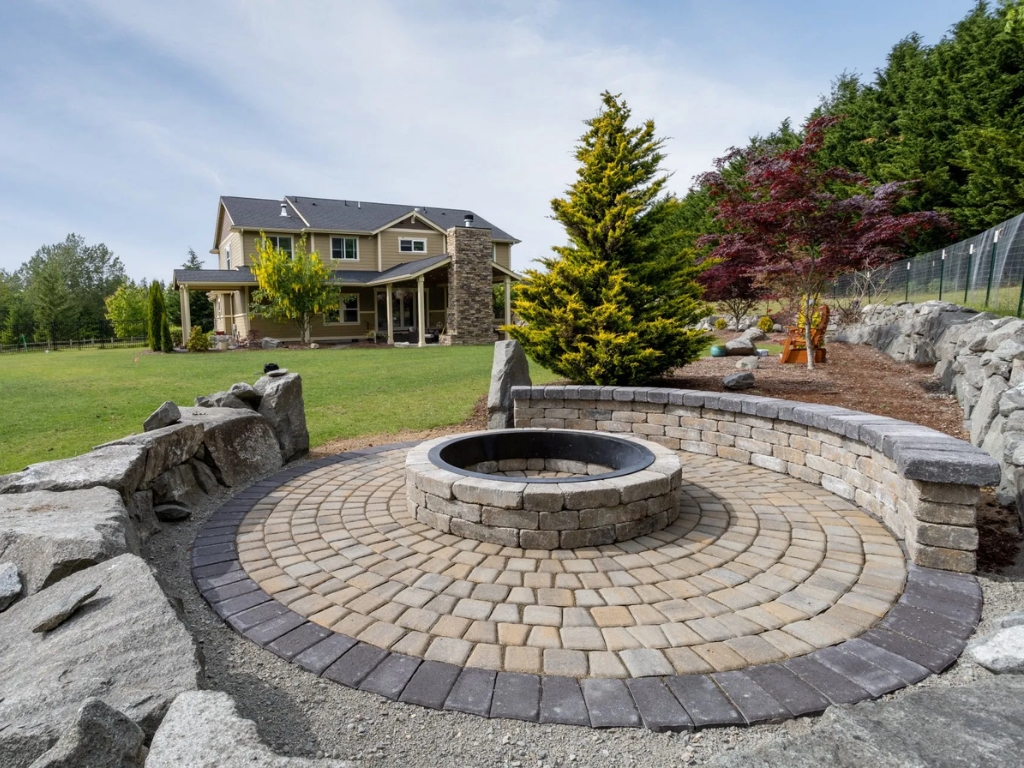
Fire Pit Area Pavers
Fire pit area pavers create a cozy and durable space for gathering around the fire. Opt for heat-resistant materials like concrete or natural stone to withstand high temperatures.
-
Retaining Wall Pavers
Retaining wall pavers provide structure and prevent soil erosion on sloped landscapes. Use heavy-duty pavers designed to handle weight and pressure.
-
Courtyard Pavers
Courtyard pavers help you design an inviting space for relaxation or entertaining guests. Choose elegant materials like natural stone or brick to create a timeless look.
-
Stepping Stone Pavers
Stepping stone pavers offer a simple way to create paths through your lawn or garden. They blend naturally into the landscape and provide a practical walking surface.
How are Pavers Installed?
Installing pavers can seem overwhelming if you’re new to the process, but with the right knowledge and tools, you can transform your outdoor space with stunning results. Here’s a detailed walk-through from initial planning to the final touches.
Planning Your Paver Project
Proper planning is essential to ensure your paver installation goes smoothly and lasts for years. Start by measuring the area where you want to install the pavers. Using a measuring tape, note the exact dimensions, and sketch a simple layout on paper. This will help you visualize the project and determine how many pavers you need.
Next, define the purpose of the project—whether it’s a patio for entertaining, a driveway that needs to bear vehicle weight, or a pathway for foot traffic. Consider the slope and drainage requirements as well; the area should have a slight incline of about 1 inch for every 4 feet to ensure water flows away from structures.
Finally, choose pavers that suit your style and functional needs, such as durable concrete, classic brick, or elegant natural stone. Pick a pattern that matches the project type, like herringbone for strength or running bond for simplicity.
Tools and Materials Checklist
Materials
- Pavers (based on your design and measurement)
- Gravel or crushed stone (for the base layer)
- Bedding sand (to create a smooth base)
- Joint sand (to fill the gaps between pavers)
- Edging restraints (plastic or metal to secure the edges)
Tools
- Shovel (for digging)
- Rake (to spread materials)
- Wheelbarrow (to transport gravel and sand)
- Level (to check for even surfaces)
- Tape Measure (for accurate dimensions)
- Plate Compactor (to compact the gravel base)
- Rubber Mallet (to tap pavers into place)
- Broom (for sweeping in joint sand)
Preparing the Site
Site preparation is one of the most important steps in paver installation. Begin by marking the boundaries of your project using wooden stakes and string. This outline will give you a clear visual reference as you work.
Double-check the layout to ensure all corners are square, especially if your design includes straight edges. To verify right angles, use the 3-4-5 triangle method (measure 3 feet along one side, 4 feet along the adjacent side, and adjust until the diagonal between them is exactly 5 feet).
After marking, excavate the soil to a depth of 6-8 inches for patios and walkways or 10-12 inches for driveways. Remove all grass, roots, and debris to create a clean, solid foundation. Finally, ensure your excavation follows the necessary slope for drainage.
Installing the Base Layer
The base layer provides crucial stability for your paver surface. Start by spreading a layer of gravel or crushed stone evenly over the excavated area.
The base should be 4-6 inches thick for patios and pathways and thicker for driveways to support heavier loads. Use a rake to distribute the gravel smoothly.
Next, compact the gravel thoroughly with a plate compactor. Make multiple passes over the surface to ensure the base is solid and level.
Proper compaction prevents future settling or shifting of pavers. Check that the base maintains the correct slope for drainage, using a level or string line as a guide.
Adding the Bedding Sand
Once the base layer is complete, it’s time to add a bedding layer of sand. This layer, about 1 inch thick, acts as a cushion for the pavers and helps create a smooth, even surface.
Spread the sand over the compacted gravel, ensuring it covers the entire area uniformly. Use a screed board (a straight 2×4) to level the sand by dragging it across the surface. Work in sections and make adjustments as needed to ensure the sand is consistently level.
Avoid compacting the sand; it should remain loose so that the pavers can settle into place when installed.
Laying the Pavers
Begin laying pavers from a fixed point, such as a corner or a straight edge, to ensure alignment. Place each paver gently onto the sand, pressing it firmly against its neighbors to minimize gaps.
Follow your chosen pattern, such as a herringbone, basketweave, or running bond design, to maintain consistency. Periodically check that the pavers are level using a level or a straight board. If any paver is too high or low, adjust it by adding or removing sand.
Use a rubber mallet to gently tap each paver into place, ensuring a snug and even fit across the surface.
Securing the Edges
Edge restraints are essential for keeping your pavers in place over time. After laying all the pavers, install edging restraints along the perimeter of the project. These can be made of plastic, metal, or concrete.
Position the edging tightly against the outermost pavers, and drive stakes or spikes into the ground every 12 inches to anchor the edging securely. Edge restraints prevent lateral movement, ensuring that the pavers won’t shift due to traffic, weather, or erosion.
Filling the Joints
Filling the joints between pavers stabilizes the surface and prevents weed growth. Spread a layer of fine, dry sand over the paver surface. Use a broom to sweep the sand into the gaps between the pavers, working it in thoroughly.
Once the joints are filled, use a plate compactor to vibrate the sand deeper into the gaps. Check for any low areas and add more sand if necessary. Repeat this process until all joints are tightly filled, ensuring a stable and durable paver surface.
Final Touches
To complete your project, clean the surface by sweeping off any excess sand. For additional protection and to enhance the paver color, consider applying a sealer.
A paver sealer protects against stains, fading, and weed growth, while also providing a polished finish. Follow the manufacturer’s instructions for application, and allow the sealer to dry completely before using the area.
With these final touches, your new paver installation is ready to enjoy!
Tips for a Successful Paver Installation
To ensure your paver installation project goes smoothly, consider these expert tips:
Tip #1: Plan Your Layout Thoroughly
Before you begin, sketch out your design and decide on patterns, dimensions, and paver types. Planning minimizes mistakes during installation.
Tip #2: Prepare a Solid Base
A stable base is crucial for preventing pavers from shifting over time. Excavate the area and compact the soil before adding gravel and sand layers.
Tip #3: Use Quality Materials
Invest in high-quality pavers and materials to ensure durability and longevity. Cheap pavers may crack or fade quickly.
Tip #4: Ensure Proper Drainage
Slope the installation area slightly to direct water away from structures. This prevents pooling and damage to your pavers.
Tip #5: Seal Your Pavers
Sealing pavers can protect them from stains, weather damage, and wear. Regular sealing helps maintain their appearance and longevity.
Conclusion
A beautiful, durable outdoor space is within your reach with the right paver installation. Whether you’re dreaming of a new patio for relaxing evenings, a walkway to enhance your garden, or a driveway that boosts curb appeal, thoughtful planning and precise execution make all the difference.
Don’t settle for ordinary — let Eli’s Paver Patios turn your vision into reality with professional craftsmanship and stunning results. Contact us today and take the first step toward transforming your yard into a space you’ll love for years to come!