Welcome, homeowners! Are you looking to transform your patio area without breaking the bank? You’re in the right place. Installing pavers is not just a project; it’s an adventure beautifying your home. And yes, you can be the hero of this story.
Let’s dive into the world of DIY paver installation and turn your backyard into a masterpiece.
Key Takeaways
- Paver Installation is Feasible and Rewarding: Homeowners can successfully install pavers themselves with proper planning and the right tools. It’s a cost-effective way to enhance outdoor spaces.
- Planning is Crucial: Before starting, choose the right pavers and design, and measure your space. This step sets the foundation for your project’s success.
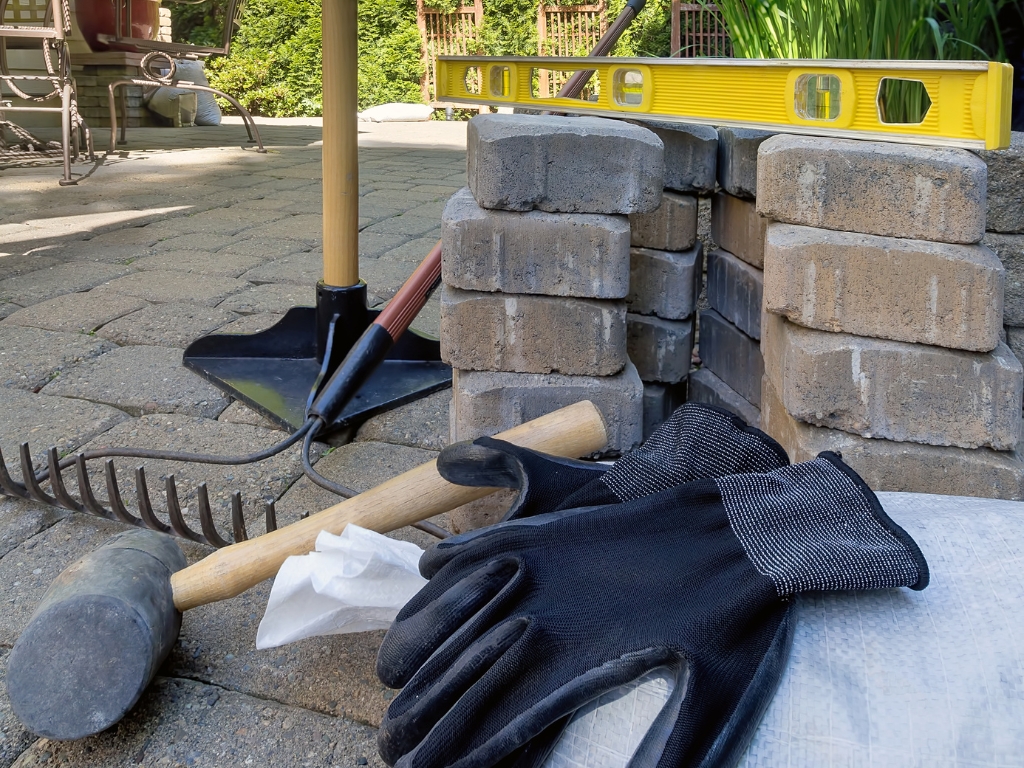
- The Right Tools and Materials to Make a Difference: Essential tools include a shovel, level, tamper, saw, rubber mallet, and broom. Key materials are pavers, base material, sand, and edge restraints.
- Follow the Steps Carefully: The installation process involves site preparation, laying the base, adding sand, placing pavers, cutting when necessary, securing edges, and finishing touches like sanding and sealing.
- Maintenance Ensures Longevity: Regular cleaning, sealing, and addressing common issues like weeds will keep your paver patio in top condition.
- Avoid Common Mistakes: Ensure a solid base, use edge restraints and maintain consistent joint spacing to prevent future problems.
Can I Install the Pavers Myself?
Absolutely! With the right guidance, installing pavers is a feasible DIY project. It’s like building a jigsaw puzzle, only bigger and more rewarding. While professional installations are great, doing it yourself can save money and give you a profound sense of accomplishment.
Whether you’re a seasoned DIYer or a novice, you can create beautiful patio pavers with patience and attention to detail.
Planning Your Paver Project
Before you embark on the journey of laying patio pavers for your outdoor space, remember the five Ps: Proper Planning Prevents Poor Performance.
Choosing the right patio pavers is akin to selecting the perfect outfit for a special occasion. Consider factors such as the climate, the intended purpose of the patio area (whether it’s for a paver patio, a walkway, or a driveway), and, of course, your personal style. Measure the patio area carefully and sketch out a design, as this step serves as your roadmap to success.
Consider incorporating elements like concrete pavers, paver sand, crushed gravel, and excess sand into your plan. Utilize a plate compactor to ensure a sturdy foundation, and explore the benefits of polymeric sand for improved stability. When you lay pavers, be mindful of landscape fabric and paver base panels for added durability and longevity to your paver patio project.
Tools and Materials for Paver Installation
Prepare for your DIY endeavor by assembling the essential tools and materials to guide you through the process. Here’s a comprehensive list, along with some valuable insights:
Shovel and Rake
These are indispensable for excavation and leveling, ensuring a proper foundation for your pavers.
Level
A level is crucial to guaranteeing an even base, promoting stability and longevity for your paver project.
Tamper or Plate Compactor
This tool is essential for compacting the base, creating a solid, stable foundation that prevents shifting over time.
Wet Saw
If you don’t own a wet saw, consider renting one for precision in cutting pavers. This ensures clean and accurate cuts that fit your design seamlessly.
Rubber Mallet
Use a rubber mallet to gently set pavers in place, avoiding damage while ensuring a snug fit for a polished finish.
Broom
Finish your installation by using a broom to evenly spread sand over the pavers, filling joints and providing stability.
In addition to these tools, it’s crucial to wear appropriate safety gear, including gloves and safety glasses, to protect yourself during installation.
Also, consider consulting online tutorials or seeking advice from experienced DIYers for additional tips and tricks to make your paver installation project successful.
Materials:
- Pavers: Choose styles that speak to you and fit your budget.
- Base Material: Typically crushed stone or gravel.
- Sand: To provide a bed for the pavers and fill in the joints.
- Edge Restraints: To keep your pavers from shifting.
Paver Installation Guide
Eli’s Paver Patios provides a comprehensive guide to installing your dream paver patio. With our expertise and your dedication, you can transform your outdoor space into a stunning retreat. Here’s how:
1. Preparing the Site:
Clear the area of debris and vegetation. Excavate to a depth that accommodates the base layer, sand, and pavers.
Eli’s Expert Tip: A depth of 7-8 inches is ideal for patio pavers. Use a level to ensure the area is even.
Benefit: Proper excavation ensures durability, preventing sinking and shifting of pavers.
2. Laying the Base:
Spread crushed stone or gravel as the base material. Compact it using a plate compactor.
Eli’s Expert Tip: Aim for a base thickness of 4-6 inches for optimal stability.
Benefit: A well-compacted base prevents drainage issues and paver movement.
3. Adding Sand:
Apply a layer of coarse sand over the base. Level and smooth it out.
Eli’s Expert Tip: A layer of 1-2 inches is sufficient to cushion the pavers.
Benefit: Sand facilitates precise leveling of pavers and drainage.
4. Placing the Pavers:
Follow your chosen pattern by laying your pavers from a corner or edge.
Eli’s Expert Tip: For a professional finish, keep joint lines straight and spaces uniform.
Benefit: Proper placement ensures a visually appealing and stable patio.
5. Cutting Pavers:
Measure and mark pavers that need trimming to fit edges and corners.
Eli’s Expert Tip: Use a diamond blade wet saw for clean cuts. Safety first!
Benefit: Custom-cut pavers ensure a seamless fit and a polished look.
6. Securing the Edges:
Install paver edge restraints around the perimeter.
Eli’s Expert Tip: Use sturdy, weather-resistant materials for the restraints.
Benefit: Edge restraints prevent shifting and spreading of pavers.
7. Finishing Touches:
Spread fine-grained sand over the pavers and sweep it into the joints. Tamp the area again.
Eli’s Expert Tip: Consider using polymeric sand for enhanced weed and insect resistance.
Benefit: This final step locks the pavers in place and completes your patio.
With these steps and Eli’s Paver Patios’ expertise, your DIY project will not only be a rewarding experience but also result in a professional-quality patio that you’ll enjoy for years to come.
Common Mistakes to Avoid in Paver Installation
Embarking on a DIY paver project is exciting, but even the most enthusiastic homeowners can encounter pitfalls. At Eli’s Paver Patios, we want to ensure your journey to a beautiful patio is as smooth as possible.
Here are some common mistakes to avoid, along with examples to help you understand their impact:
Not Preparing the Base Adequately:
One common mistake is rushing through or skimping on the base preparation phase. Imagine laying a beautiful carpet on an uneven floor. Without a properly leveled and compacted base, your pavers may sink or create an uneven surface over time.
For instance, if you only compact the top layer of your base material and ignore deeper layers, it can lead to uneven settling once the weight of the pavers is added.
How to Avoid
Ensure you excavate to the right depth and compact each base material layer thoroughly. This is like laying a strong foundation for a building – it’s essential for its stability.
Skipping the Edge Restraints:
Think of edge restraints as the frame of a puzzle. Without them, your pavers can shift outward, leading to gaps and a disjointed appearance. For example, a patio without edge restraints could slowly spread out, causing the pavers at the edge to tilt or separate.
How to Avoid
Always install durable edge restraints. They act like a barrier, keeping your design intact and maintaining the integrity of your patio.
Inconsistent Joint Spacing:
Uneven joint spacing can disrupt your patio’s overall aesthetic and pattern integrity. Imagine a brick wall with haphazardly spaced bricks; it looks untidy and compromises the structure. In a paver patio, irregular joint spacing can lead to loose pavers and tripping hazards.
How to Avoid
Use spacers or a consistent measure to maintain even spacing between pavers. It’s akin to following a grid in a cross-stitch pattern – precision is key for a beautiful and safe finish.
Knowing these common mistakes and their implications, you can navigate your DIY paver installation project more confidently and skillfully. Remember, a little extra attention and care during the installation process can save you a lot of time and effort in repairs down the road.
At Eli’s Paver Patios, we’re here to help you every step of the way to ensure your patio is a feature of beauty and enduring quality.
Conclusion
Congratulations on embarking on your DIY paver patio project! Patience and dedication are key to transforming your outdoor space into a masterpiece. You’re not just enhancing your home; you’re embracing the role of a DIY Budget Hero.
Eli’s Paver Patios is here to assist if you encounter any hurdles or need expert advice. Share your journey, questions, or insights in the comments below, and join our community of enthusiastic DIYers. For further guidance or quality materials, visit Eli’s Paver Patios’ website or contact us directly. Let’s create beautiful, lasting outdoor spaces, one paver at a time.
Frequently Asked Questions (FAQ)
1. How deep should I dig for installing pavers?
The depth depends on the use of the area. For patios and walkways, a depth of about 7-8 inches is typical, including the base material and sand layers. Driveways may require deeper excavation.
2. Can I install pavers over existing concrete?
Yes, you can install pavers over concrete, provided the concrete is in good condition without major cracks or unevenness. However, it’s important to ensure proper drainage.
3. How do I choose the right type of pavers?
Consider the climate, usage (patio, walkway, or driveway), and your aesthetic preference. For high-traffic areas, choose durable pavers, and in cold climates, opt for frost-resistant materials.
4. What is the purpose of sand in paver installation?
Sand serves two main purposes: it acts as a bed for the pavers, providing a level surface for placement, and it is used to fill the joints between pavers, securing them in place and preventing weed growth.
5. How often should I seal my paver patio?
It’s recommended to seal paver patios every 3-5 years. Sealing helps protect against stains, fading, and weather damage, and it can enhance the color of the pavers.
6. What do I do if my pavers start to sink or shift?
If pavers begin to sink or shift, it’s often due to an issue with the base. Remove the affected pavers, recompact the base material, and reinstall the pavers. Ensuring proper base preparation initially can prevent these issues.
7. How do I handle weed growth between pavers?
To control weeds, regularly sweep sand into the joints, use a weed preventer, and consider using polymeric sand, which hardens and helps prevent weed growth and insect intrusion.