If you’re adding raised garden beds to a yard that already has a patio, you’re not “just building a planter.”
You’re adding a new hardscape element that will sit right next to the most expensive, most visible part of your outdoor space. That’s why this decision feels high-stakes. If the bed looks off, it won’t just look off on its own. It will make your patio look less intentional, too.
The good news is you don’t need to guess your way into a match. You need a foolproof method: one that considers how materials read in real light, how lines carry across a space, and how water and soil pressure affect the long-term look.
Stop Trying to “Match the Paver.” Match the System.
Most people search for the exact same paver. That works sometimes, but it’s not a reliable path.
Here’s why: your patio is horizontal, your raised bed is vertical, and those two surfaces behave differently. Vertical faces show more shadow, collect dust differently, and highlight texture in a way patios don’t. Even with the same product, the bed can look darker and more dramatic.
So instead of matching the exact unit, match the system your patio belongs to:
- Color family: warm, cool, or blended
- Finish: smooth/modern or tumbled/traditional
- Scale: thin and clean vs. thick and bold
- Lines: straight geometry vs. intentional curves
- Details: borders, caps, steps, coping, seat walls
When you align those, your raised bed can be a different product line and still look like it was planned from day one.
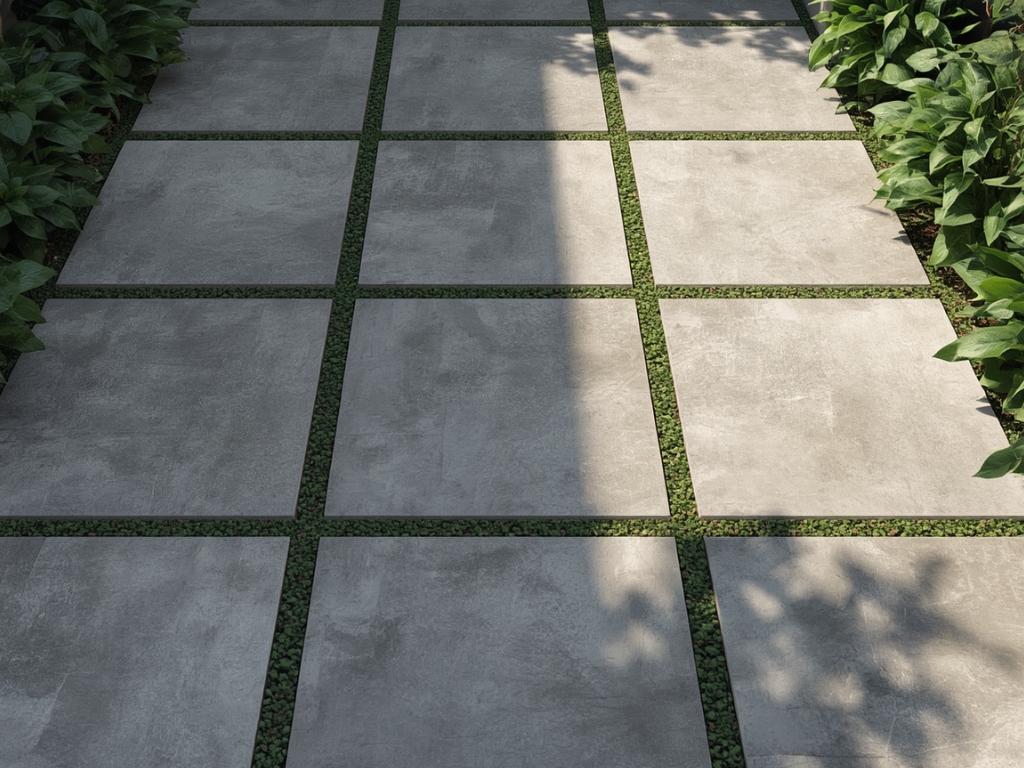
 807 4198 infographics of raised garden beds")
Step 1: Choose the Anchor That Your Eye Will Compare First
If you try to match everything in the yard, you’ll end up with something that feels “kind of close” to all features and truly connected to none.
Pick one anchor.
The anchor is the hardscape element that the raised bed will visually compete with in the same frame. For most homes, it’s the patio. But if the bed is near steps, a seat wall, or a retaining wall, those features often become the anchor because they’re closer and more comparable in height.
Use this test:
Stand in the spot where you’ll see the raised bed the most:
- Your main patio seating area
- Your kitchen window view
- The doorway where you step outside
Now ask: What hardscape feature sits closest to where the bed will go, and what feature dominates the view?
That feature becomes the anchor. Match your raised bed to that first. Let everything else be secondary.
Step 2: Match Color the Way Pros Do with Three Lighting Checks
Most mismatches happen because homeowners compare a dry sample in a store to a patio that’s been weathered outdoors.
Here’s a better way to compare.
Bring your wall block and cap samples outside and check them in three conditions:
- Full sun (midday)
- Open shade (late afternoon or under patio cover)
- Slightly wet (spritz with a hose or water bottle)
Why this matters: Wet pavers darken and saturate, and raised beds get splashed constantly. If your “perfect match” only looks good when dry, it won’t look good around irrigation and soil.
Next, don’t hold the sample flat in your hand. Prop it upright against something. You’re testing a wall, not a patio. This simple step prevents the common surprise of, “Why does it look so much darker once installed?”
What You’re Actually Looking For
You’re not looking for an identical color. You’re looking for the same “temperature” and a compatible contrast level.
- Warm patio → warm wall/cap
- Cool patio → cool wall/cap
- Blended patio → choose a mid-tone wall and let the cap carry the accent
If your patio is multi-colored and your wall block is flat one color, the wall can look “cheap” next to the patio. In that case, a blended wall block or a cap with some variation usually fixes the imbalance.
Step 3: Texture and Edge Style Matter More Than Most People Think
Two materials can be the same color and still clash because the finishes tell different stories. Here’s what to compare, specifically:
- Edge profile: sharp vs. softened/tumbled
- Face texture: flat/smooth vs. clefted/stone-like
- Surface sheen: sealed or naturally matte
- Joint look: tight and crisp vs. wider and rustic
If your patio has clean joints and crisp edges, a heavily tumbled raised bed will read as older and more casual. If your patio is tumbled and rustic, a sleek wall block can look too modern and “separate.”
A high-level rule that works:
- Modern patio: straight wall blocks + straight cap + tight joints
- Traditional patio: tumbled wall blocks + tumbled cap + softer corners
This is not about trends. It’s about visual consistency. The closer the texture language is, the more “built-in” the bed will feel.
Step 4: Use Geometry to Make the Whole Yard Feel Intentional
Geometry is the easiest “free” design win. Your patio likely has dominant lines, such as edges, borders, patterns, and step alignments. If your raised bed ignores those lines, your yard can start to feel visually noisy.
- Straight beds
If your patio is mostly straight lines, build the raised bed rectangular and parallel to a major patio edge. This creates a subtle sense of order, even if the bed is 10–20 feet away.
- Curved beds
Curves work when they repeat an existing curve in the hardscape. If your patio is straight and the raised bed is curved “just because,” the curve usually feels like a compromise, not a design decision.
- A practical alignment trick
Pick one patio edge line and extend it visually into the yard. Place the raised bed so its long face runs parallel to that line. Your eye will read the space as planned without knowing why.
Step 5: Choose the Right Materials for a Vertical Wall
This is where “matching the patio paver” leads people into structural problems. Patio pavers are designed to sit on a compacted base and distribute load. Raised garden beds are vertical and deal with soil pressure, water, and seasonal movement.
If you want your raised bed to stay straight and tight over time, use wall-grade products:
- Garden wall blocks / segmental wall blocks are designed to stack and align
- Double-sided wall units if the bed is visible from both sides
- Matching capstones designed for clean top lines
If you stack standard pavers, you’re asking for more work and more risk. You’ll fight alignment, you’ll need a better bonding strategy, and you’ll often end up with a top edge that never looks as clean.
If your goal is thought-leader quality, treat raised beds like small walls. That mindset alone eliminates most of the long-term failure issues.
Step 6: Make the Cap Do the Connecting
If there’s one element that can unify the whole look, it’s the cap. Caps matter because they create the top line your eye follows, and they’re where your hands go. A bad cap looks unfinished. A good cap makes the bed feel like a designed feature.
Here’s how to choose caps with intention:
- Option A: Match the patio border
If your patio has a border, use that border tone on the cap. This works because you’re repeating a detail the yard already uses. - Option B: Match step caps or coping
If you have step caps, pool coping, or a seat wall cap, echo that thickness and finish. This creates a “family” of top edges across the yard. - Option C: Create controlled contrast
If your patio is busy (lots of blend), a simpler wall with a slightly darker cap can look premium. It frames the bed and makes the design feel deliberate, not accidental.
Step 7: Scale Is What Makes It Look High-End
Scale is not talked about enough. A raised bed can match perfectly, but still look wrong because it’s too short, too tall, too thin, or too bulky for the patio’s visual weight.
Here’s a better way to check scale. Look at your step riser height and seat wall height (if you have them). Then, compare the raised bed’s planned height to those of the existing “vertical elements.”
If your patio features are bold with thick caps, wide steps, and strong borders, your raised bed should have similar visual weight. That often means a thicker cap and a wall system that doesn’t look flimsy.
If your patio is minimal and sleek, a chunky rustic raised bed can steal attention and make the space feel unbalanced. In that case, keep the bed lower, cleaner, and more linear.
Step 8: Design for Real Use, Not Just Looks
A raised bed can look great and still be annoying. So plan movement like you’re going to use it every week because you are.
You need space to:
- stand and water
- kneel and harvest
- carry soil and compost
- move a hose or drip lines
- access all sides (or at least the working sides)
If the bed is too close to the patio, the gap becomes dead space that’s hard to walk through and hard to keep clean. If it’s too far away with no transition, it becomes disconnected.
This is where pavers give you a big advantage. A small connecting path or pad can turn “a bed out there” into a functional garden zone that feels like part of your outdoor living space.
Step 9: Drainage Is the Difference Between “New” and “Still Looks New”
Water can ruin good-looking projects over time. Raised beds get watered often, and that moisture can soak into the patio base, causing uneven settling.
It can also stain nearby pavers from mineral deposits and soil splash. And if water gets trapped behind the wall, pressure can build and lead to bulging or shifting.
You don’t have to turn this into an engineering project, but you do need to avoid the common trap of placing a bed where water naturally collects or drains toward the patio.
If you’re unsure, do one simple test. Water the area for five minutes and watch where it flows. That quick observation can save you from a design that looks great but fails slowly.
The Bottom Line
When raised garden beds look right, you don’t notice them as a separate feature. You notice that the yard feels complete. That comes from a handful of disciplined choices: tone, texture, geometry, cap details, scale, and the way people move through the space.
If you want paver raised garden beds that look like they were built with your patio, Eli’s Paver Patios can help you plan the details that make the difference.