A newly installed paver patio or driveway can instantly transform an outdoor space. However, maintaining its appearance requires more than occasional cleaning. One important consideration homeowners often overlook is knowing when to seal their pavers and when to schedule the first reseal.
Should you seal new pavers immediately after installation? How long should you wait before resealing? Understanding the paver sealing timeline, from initial preparation and application to routine maintenance and the first reseal, helps homeowners protect their outdoor surfaces and avoid costly mistakes.
Understanding the Purpose of Paver Sealing
Paver sealing involves applying a protective product to concrete, brick, or natural stone surfaces to help reduce staining, moisture absorption, and weather-related wear.
Depending on the product, sealing may also enhance the pavers’ natural color or create a glossy finish. Two common categories include:
- Penetrating Sealers: They absorb into compatible surfaces to provide protection while maintaining a more natural appearance.
- Film-forming Sealers: They create a surface coating that may enhance color and provide a satin or glossy finish.
Although sealing offers several benefits, it does not make pavers maintenance-free. Regular cleaning and proper drainage remain essential.
How Often Should Pavers Be Sealed?
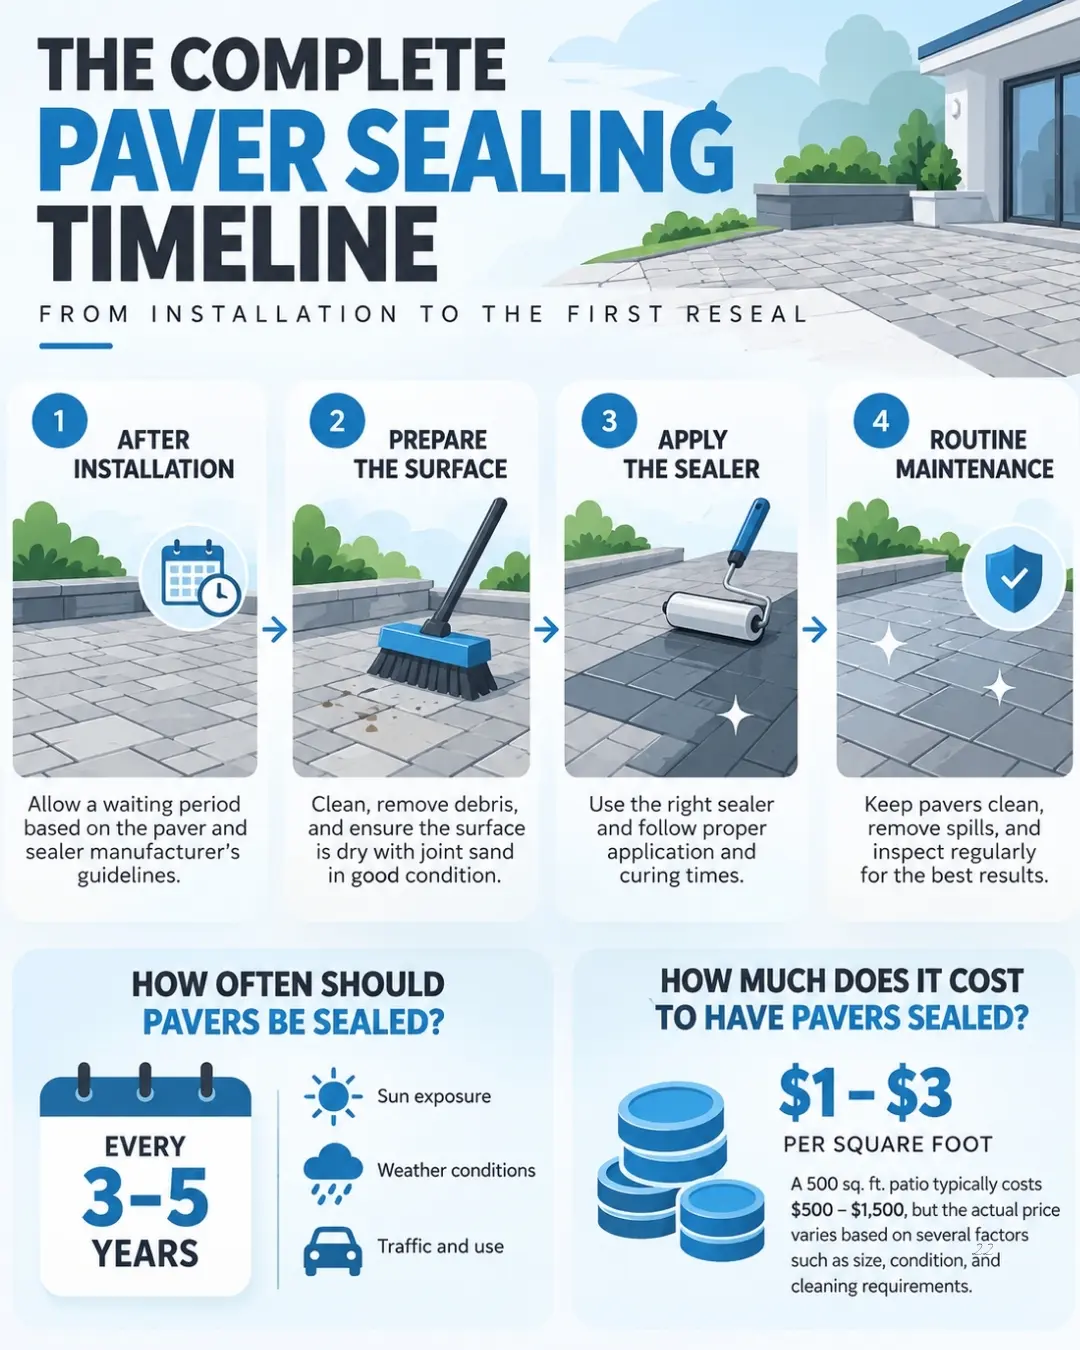
One of the most common maintenance questions concerns resealing frequency. According to the Concrete Masonry & Hardscapes Association (CMHA), paver sealers generally require reapplication every three to five years, although actual intervals vary depending on conditions and product performance.
Several factors influence this schedule:
- Sun Exposure: UV radiation can gradually degrade certain sealers.
- Weather Conditions: Frequent rain and seasonal temperature changes affect surface performance.
- Foot and Vehicle Traffic: Heavily used areas may experience faster wear.
- Cleaning Practices: Harsh chemicals and aggressive pressure washing can damage protective coatings.
Signs that resealing may be necessary include increased water absorption, fading color enhancement, and reduced stain resistance.
However, homeowners should avoid applying additional sealer simply because several years have passed. A surface inspection helps determine whether another application is appropriate.
Paver Sealing Timeline at a Glance
The following timeline provides general estimates for homeowners. Actual waiting periods depend on the paver material, sealer specifications, weather conditions, and installation requirements.
| Stage | Estimated Timeline | What to Expect |
| 1. Initial Waiting Period | Approximately 30–90 days after installation for products requiring a waiting period | Allow the pavers to dry and address any efflorescence before sealing. Some products permit earlier application. |
| 2. Surface Preparation | Typically 1–2 days before sealing | Clean the pavers, remove stains, inspect joints, and allow the surface to dry. |
| 3. Sealer Application & Curing | Application typically takes 1 day; curing may take 24–72 hours | Apply the appropriate sealer and avoid traffic until the manufacturer permits it. |
| 4. Routine Maintenance | Ongoing; inspect seasonally | Clean regularly, address stains, and check for wear or drainage issues. |
| 5. First Resealing | Generally 3–5 years after initial sealing | Inspect the existing coating and determine whether resealing or additional preparation is needed. |
Note: These are illustrative planning estimates, not universal industry requirements. The 30–90-day waiting period and preparation/curing durations should be verified against the specific products used. The 3–5-year resealing estimate is supported by the CMHA source already included in the blog.
While this timeline provides a general guide, every paver installation is different. The following stages explain what homeowners should consider from the initial installation through the first resealing.
Stage 1: The First Few Weeks After Installation
The first stage of the paver sealing timeline begins immediately after installation. While homeowners may want to protect their new surfaces right away, some paving materials and sealers require a waiting period.
Several factors determine when sealing can begin:
- Paver Material: Concrete, clay brick, and natural stone have different preparation requirements.
- Surface Moisture: Excess moisture can interfere with certain sealing products.
- Efflorescence: White mineral deposits may appear as moisture moves through concrete pavers.
- Manufacturer Guidelines: Recommended waiting periods vary by product and installation method.
There is no universal waiting period for sealing newly installed pavers. Some sealing systems may be suitable for application shortly after installation, while others require additional drying or curing time. Homeowners should follow the paver and sealer manufacturers’ recommendations before scheduling the first application.
Stage 2: Preparing for the First Sealing Application
Proper preparation helps ensure consistent coverage and effective protection. Before applying sealer, professionals typically inspect the surface for damage, stains, and mineral deposits. They then remove accumulated dirt, debris, and organic growth.
Joint sand may also require replenishment, particularly where washing or settling has created gaps between pavers.
After cleaning, the surface must dry sufficiently before sealing. Applying certain sealers over damp pavers can cause hazing, uneven coloration, or adhesion problems.
Stage 3: Applying the Sealer and Allowing It to Cure
Once preparation is complete, the sealing application begins.
Professionals select an appropriate product based on the paver material, desired appearance, and exposure conditions. Depending on the manufacturer’s instructions, application may involve spraying, rolling, or multiple coats.
Drying and curing are equally important.
Although some surfaces become suitable for light foot traffic relatively quickly, full curing may take longer. Homeowners should follow product-specific instructions before replacing furniture, washing the surface, or parking vehicles.
Stage 4: Maintaining Pavers Between Sealing Applications
Proper maintenance helps preserve sealed surfaces and may reduce the need for premature resealing. Homeowners can follow several straightforward practices:
- Sweep regularly to prevent dirt accumulation.
- Remove spills promptly to minimize staining.
- Use cleaning products compatible with the pavers and sealer.
- Avoid excessive pressure during washing.
- Inspect joint sand, drainage, and surface conditions periodically.
Seasonal inspections are particularly useful after prolonged rainfall, freezing weather, or periods of heavy outdoor activity.
Stage 5: Preparing for the First Paver Reseal
Eventually, the original protective treatment may begin losing effectiveness. Before resealing, professionals should evaluate the existing product and surface condition. Some pavers may need only thorough cleaning and another compatible application.
Others may require additional preparation, especially when previous film-forming coatings have deteriorated, discolored, or become incompatible with new products.
Applying excessive layers without assessing the existing coating can create cloudy finishes or moisture-related problems.
A professional evaluation helps determine whether resealing, coating removal, or another maintenance approach is appropriate.
How Much Does It Cost to Have Pavers Sealed?
The cost of professional paver sealing varies depending on the size of the area, the condition of the pavers, the preparation required, and the type of sealer used. A patio that needs only basic cleaning and sealing may cost less than a driveway requiring extensive stain removal, joint sand replacement, or additional surface preparation.
Several factors can influence the final cost:
- Surface Area: Larger patios and driveways generally require more materials and labor.
- Cleaning Requirements: Stubborn stains, algae, and efflorescence may require additional treatment.
- Joint Sand Replacement: Missing or deteriorated sand can increase preparation expenses.
- Sealer Selection: Different sealer types and finishes can affect material and application costs.
- Accessibility: Difficult-to-reach areas may require additional labor or equipment.
For a more accurate estimate, homeowners should request a professional assessment of their pavers. Comparing detailed quotes that include cleaning, preparation, materials, and application can help homeowners understand what they’re paying for and choose the appropriate service.
Protect Your Investment With Professional Paver Sealing
From the first sealing application to routine maintenance and resealing, proper timing and preparation help preserve your pavers’ appearance and performance.
Not sure whether your patio or driveway is ready for sealing or resealing? Eli’s Paver Patios can evaluate your pavers and recommend the appropriate treatment. Contact Eli’s Paver Patios to request a quote.