A few uneven pavers may not seem like a major concern at first. But when pavers start sinking, shifting, or rocking underfoot, they can affect the appearance, drainage, and usability of your patio, walkway, or driveway.
The good news is that many paver repairs do not require replacing the entire paved area. Individual sections can often be removed, corrected, and reset. The key is finding out why the pavers moved before making the repair.
Why Do Pavers Shift in the First Place?
Pavers depend on a stable base, proper drainage, secure edging, and filled joints to remain level. When one part of this system fails, individual pavers or entire sections can begin to move.
Common reasons pavers shift include:
- Poor base compaction: A base that was not compacted properly during installation can settle unevenly and cause the pavers above it to sink or shift.
- Soil settlement: Natural changes in the soil beneath the base can create low spots that leave pavers without consistent support.
- Water erosion: Rainwater and runoff can wash away bedding or base materials, allowing pavers to settle into the resulting gaps.
- Drainage problems: Standing water or poorly directed runoff can weaken the materials beneath the pavers and contribute to gradual movement.
- Damaged edge restraints: Loose, broken, or missing edging allows outside pavers to spread outward and destabilize neighboring units.
- Tree root growth: Expanding roots beneath a paved surface can lift pavers and create raised or uneven sections.
- Heavy loads: Vehicles, equipment, or other loads can cause pavers to settle when the underlying base was not designed to support the added weight.
- Loss of joint sand: Missing joint material reduces support between individual pavers, making it easier for them to move or separate.
According to the Concrete Masonry & Hardscapes Association (CMHA), typical joint spacing for interlocking concrete pavers is approximately 1.5 to 3 mm (0.05 to 0.12 inches). Wider or inconsistent joints can be a sign of issues such as joint sand loss, inadequate edge restraints, settlement, or lateral movement. This is why identifying the underlying cause is an important part of effective paver repairs.
Identifying which of these issues caused the movement is an important first step in paver repairs because simply leveling the surface may not prevent the problem from returning.
How to Tell If Your Pavers Need Repairs
Some paver problems are easy to notice, while others develop slowly over time. Regular inspections can help you catch these early warning signs before the affected area becomes more difficult to repair.
Walk across the paved area and look for pavers that rock, sink, rise above neighboring units, or develop unusually wide joints. Separating borders and low areas where water collects can also indicate a problem.
Pay particular attention to areas that have already been repaired. If the same pavers repeatedly sink or move, there may be a deeper problem with the base, drainage, or edge restraints.
Checking the area after rainfall can also help. Look at where water collects and how runoff moves across and around the pavers.
How to Fix Pavers That Have Shifted?
Minor paver movement may sometimes be corrected by resetting the affected area, but recurring or widespread shifting can indicate deeper problems with the base, drainage, or edging that require professional evaluation.
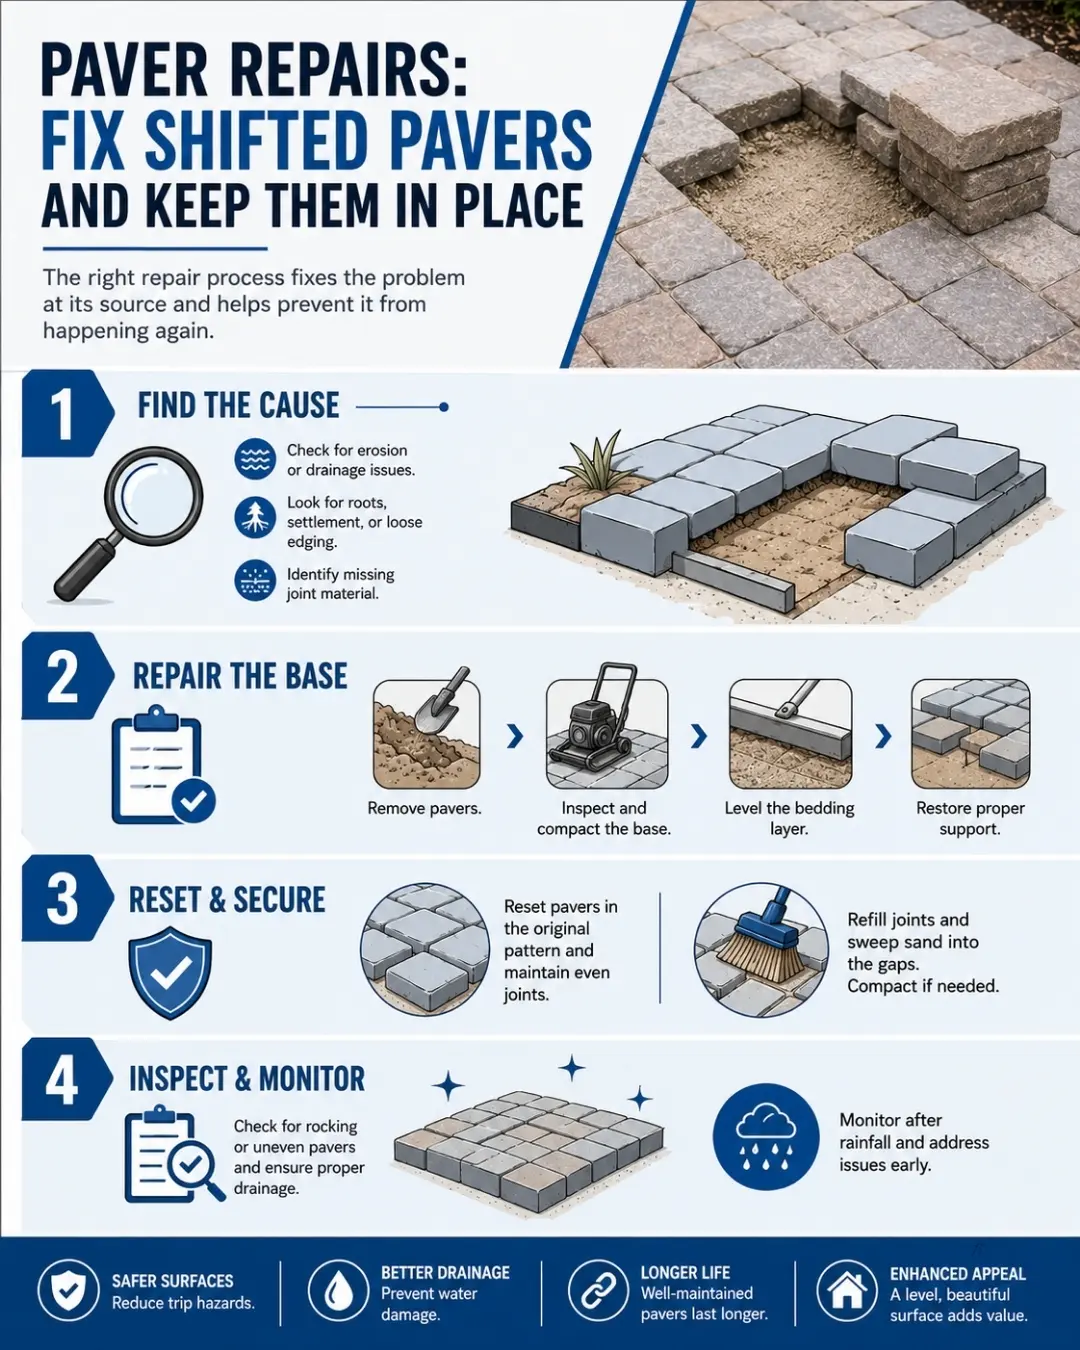
1. Find the Cause
Before removing any pavers, inspect the affected area to determine what caused them to move. Look for signs of soil settlement, erosion, loose or damaged edge restraints, growing tree roots, missing joint material, and drainage problems. Water pooling near the damaged section or soil washing away along the edges can indicate that runoff is affecting the base.
Finding the cause helps you choose the right repair method. If you reset the pavers without addressing the underlying problem, the same section may shift, sink, or rise again.
2. Remove the Affected Pavers
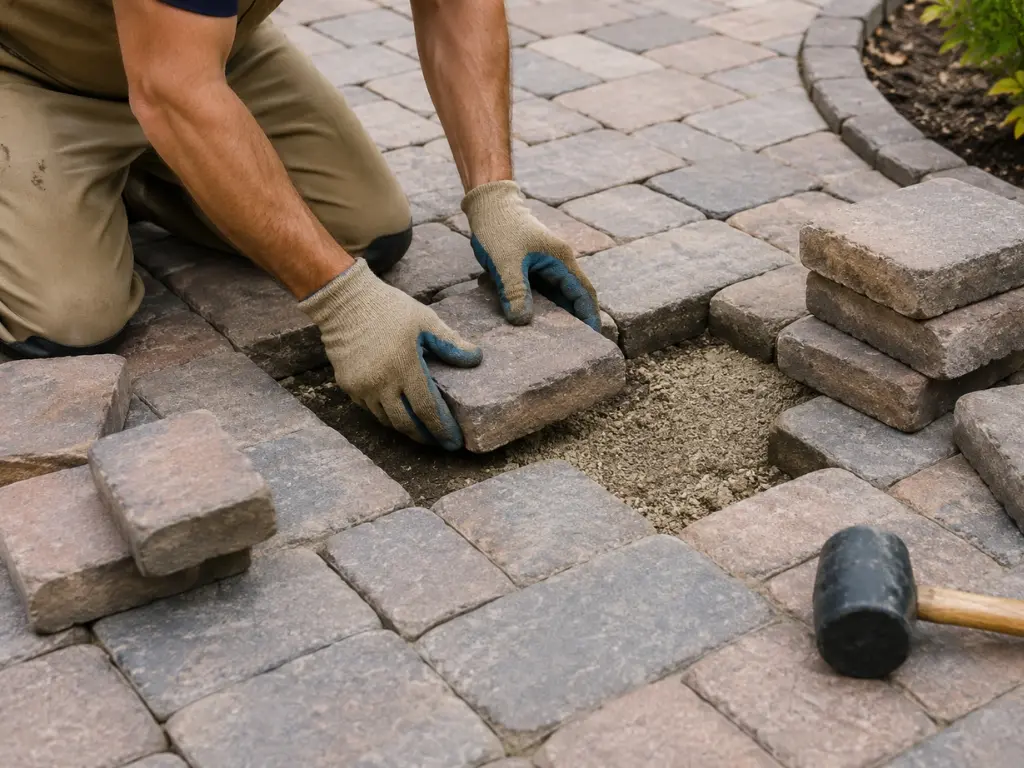
Carefully lift the shifted pavers without damaging their edges. Depending on the size of the problem, you may need to remove several surrounding pavers to expose the entire unstable section and create enough room to work.
Set reusable pavers aside on a clean surface. Pay attention to the existing pattern, orientation, and joint spacing as you remove them. Taking a photo beforehand can make it easier to recreate a more complex pattern during reinstallation.
3. Inspect and Correct the Base
With the pavers removed, examine the materials underneath them. Look for depressions, loose areas, washed-out material, or sections that have settled lower than the surrounding base. These conditions can prevent the pavers from receiving consistent support.
Replace missing base material when necessary and compact it thoroughly before restoring the bedding layer. The bedding material should then be leveled to create a consistent surface for the pavers.
Avoid simply adding a pile of loose sand beneath a sunken paver. While this may raise the paver temporarily, it does not correct deeper settlement or base failure. If the base has deteriorated, rebuilding the affected section provides a more stable foundation for the repair.
4. Reset the Pavers
Return the pavers to their original positions, following the existing pattern and maintaining consistent spacing between each unit. As you work, compare the repaired section with the surrounding surface to make sure individual pavers are not sitting too high or too low.
The finished surface should also follow the intended grade of the original installation. Proper grading helps direct water instead of allowing it to collect in low spots. Check the surface from multiple directions as you work so you can make small adjustments before completing the repair.
5. Refill the Joints
Once the pavers are level and properly positioned, refill the spaces between them with the appropriate jointing material. Make sure the material reaches the joints rather than remaining only on the surface. Filled joints help stabilize individual pavers and allow the paved area to function as an interconnected system.
6. Inspect the Finished Area
After completing the repair, walk across the section and check whether any pavers rock, move, or feel uneven underfoot. Compare the repaired area with neighboring sections and inspect the joints to confirm they are properly filled.
It is also important to monitor the area after rainfall. Watch for standing water, runoff, or erosion around the repaired section, as these signs may reveal an unresolved drainage problem. If the same pavers begin shifting again, investigate the underlying base, soil, edging, or drainage rather than repeatedly resetting the surface.
Why Resetting Shifted Pavers May Not Solve the Entire Problem
A level surface does not necessarily mean the original problem has been fixed. Suppose part of a patio sinks because runoff continually removes base material. Resetting those pavers may temporarily restore the surface, but erosion can cause the same section to settle again.
Recurring movement may indicate poor grading, damaged edge restraints, substantial base failure, roots, or ongoing drainage issues. These conditions should be identified and corrected as part of the repair; otherwise, the same pavers may continue to shift even after being reset.
How to Keep Pavers From Shifting Again
Prevention starts with maintaining the entire paved system. Keep nearby drainage working properly and watch for areas where runoff is washing soil or base material away. Repair loose edge restraints and replenish joint material when necessary.
Address small areas of movement early. One unstable section can gradually affect neighboring pavers, particularly when joints and borders lose support.
Also consider how the surface is being used. Avoid placing vehicles or unusually heavy loads on areas that were not constructed to support them.
Get Professional Paver Repairs From Eli’s Paver Patios
Shifted, sunken, or uneven pavers can continue to worsen when the underlying cause is left unresolved. Proper paver repairs address more than the surface by identifying problems with the base, drainage, edging, or other supporting components.
Don’t keep resetting pavers if the underlying problem hasn’t been addressed. Eli’s Paver Patios can assess shifted, sunken, or uneven areas, identify the cause of the movement, and recommend appropriate paver repairs.